

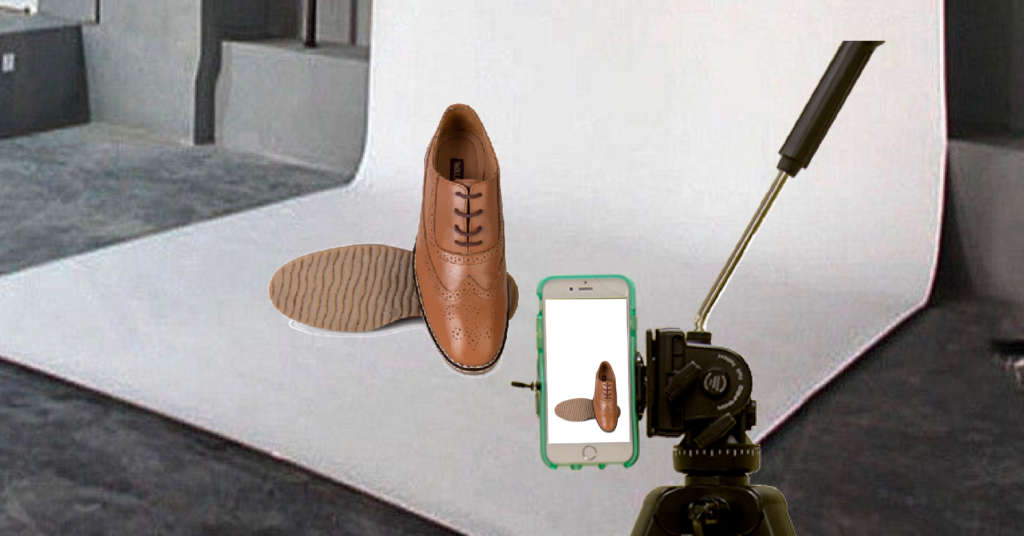
Footwear Shoot Using Mobile
Getting a grip on footwear photography is not a herculean task anymore. Be it for Instagram or your e-commerce website, you can use your smart phone to take images that are as good as your product.
Prepping for footwear photography using mobile
We are sure you must be doing that already but consider this a reminder. Polish and clean your footwear before taking images and closely examine it for any defects or scratches especially in leather and soles. Load up your shoes with tissue paper or old fabric to complete the look. You could also consider using dental floss to hold your shoe laces straight up while taking pictures.
Avoid using too many tools for making amendments to a tarnished spot on footwear. Keep the product as real as possible.
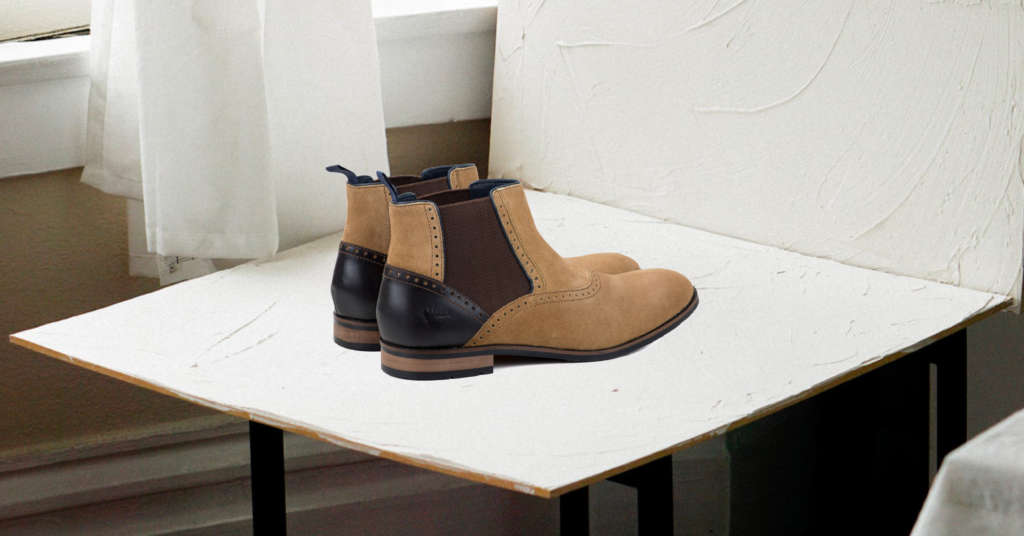
Having a good background accentuates your product. Brands prefer white color as the background for shoe photography because it imparts a neat, overall look to the image and doesn’t interfere with the colors of your shoe. Invest in a white paper roll/ sweep paper to always have a clean background ready. Another advantage of taking a white background is it allows -processing of pictures pretty easy.
Avoid using textures or funky colors as background of the image unless you are taking lifestyle shots.
Footwear photography demands softer light so placing an object near a large window (not receiving direct sunlight) is enough for a good product image. But sometimes you might need better lighting equipment to get that effect. You could place a lamp (usually 100 w or so) or go for lightbox (budget friendly) or even opt for DIY light tent for the desired effect. Always keep the lighting objects close to the product to eliminate shadows, improve contrast and illuminate the subject proportionately.
Avoid using high beamed sources of light like high-power lamps or flashes that throw direct light. If your footwear has metal work, use reflectors that are not very wide and adjust the exposure. Too much shine can reflect and create blind spots
Essential tips for footwear photo shoots
Position the shoes right
Positioning your shoes on a tabletop is one sure shot way to create a decent imagery. This spares you not only time but also the effort of bending over or scooting inappropriately while taking the image. It is much easier to take photos from different angles when placed on a table or desk. Set a permanent position by using a mark or tape on table to place your products on the same spot every time.
Avoid laying your shoes lifeless on the ground. Flay lay shoe photography is a big no-no.
Do it pro-like with these add-ons
Before you jump into footwear product photography using smartphone, here are a few add-ons that can help you take pro-like footwear images with your smartphone:
- Ring light
If you are opting for artificial lights, consider buying ring lights. Sometimes lamps may not be able to create the desired uniform effect. Ring lights give a broader, diffused effect to the object in focus evenly.
- Photo lenses
Although smartphones are equipped with great lenses nowadays, getting photo lenses can be lucrative. The regular camera may come with many features but having photo lens like a macro lens can typically enhance the picture by allowing you work in wider angles and a desired aperture
Get ready to shoot
Now your stage is ready and all you have to do is follow these footwear photography tips and ideas for beginners. Before you click on that camera icon, remember to do these few things to get a dreamy shot.
Once your set-up is done, make sure you get to the eye level of the product, crouch and take a shot from there. Taking straight shots of the product is quintessential because that is what the customer demands to see first. Especially if you are looking for a good single image, the straight-on click is your best bet.
Eye level photographs create an illusion with the buyers of viewing the product as they would in a brick and mortar store.
2. Keep track of distance
Two distances matter in product photography. For the distance between the product and camera, get close and personal. Remember to keep a good distance, not too near or you get a distorted image and not too far or you miss out the details.
The distance between the product and the backdrop also plays a role. Keep your footwear a little away form the back of table or wall or background to cut on unnecessary shadows and coat the product with soft lighting effect.
3. Don’t forget the focus feature
The footwear is your focus object and demands attention. Convey this to your smartphone by tapping on the shoes in the image twice to “focus” on the subject. Your customers should be able to see every detail of the shoe in order to make buying decision. Using blur option is a big no-no for footwear photography.
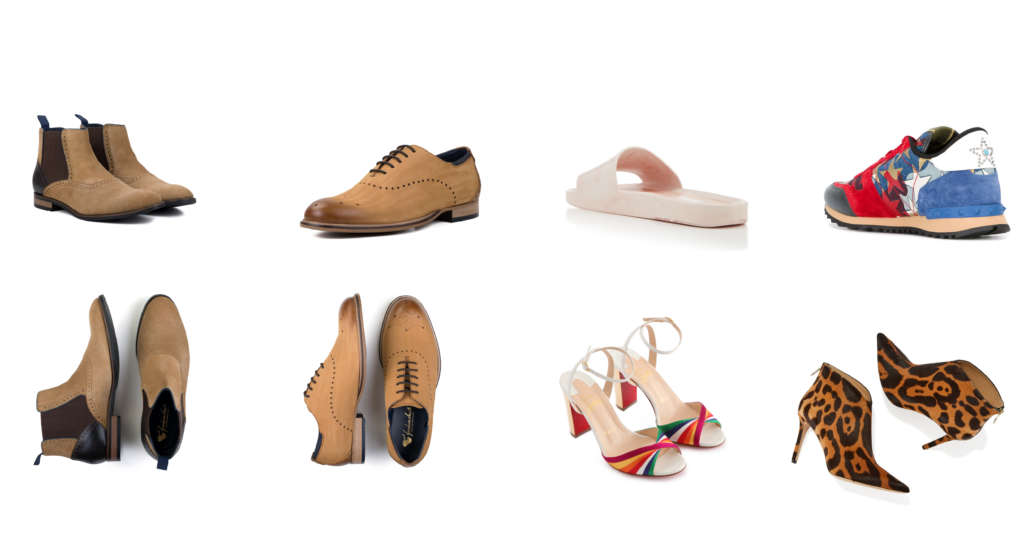
Angles play a leading role in shoe photography. The front, top, back and side angles are commonly used by footwear brands. They help your customers visualize the footwear properly as they would while buying from a retail store. Give them a good view, take a steady image from all the angles. Improve the value by including one good close-up image conveying the details like material, texture or lace design of your footwear.
You can always get creative with angles and try more advanced 360 mobile photography.
Following all the above steps again, repeat for all the other footwear waiting in line to be photographed. When you are building a brand, building a consistent theme is important. Keep consistency while doing footwear photography – like using the same tones and light effect, having similar backgrounds etc. This creates an integrated look for your profile online and leaves a recognition pattern in minds of your buyers. So, always recreate images in a pre-set background and camera settings to give a cohesive look to all your images.
6. Go with lifestyle shots
Once you get a hold of clicking good images, try using real models to flaunt your pair. A lifestyle shot allows your customers to get the real feel of wearing your footwear. This aids in buying process. No matter how good a shot, the footwear might look dull when used as stand alone.
Before you send the images to your e-commerce platforms and social media handles, process them to make them complete and ready.
There is absolutely no scope of mistakes and therefore refurbishing your images is an unavoidable step. Simple retouches like getting rid of extra lighting, hiding shadows and improving contrast of certain images can take them from good to excellent. You may not always have the expertise or the right tools to polish them and its best to give them to the editing experts who can get your sales running high.
Dos and don’ts of footwear product photography
1. Never do a top shot in flat lay style
It is always a good idea to number of angles but top shots make the shoe look dull. It is difficult to imagine walking in it. It will look like a lazy shot of the inventory or the warehouse. Shoes are meant for walking and they should be kept uptight.
It’s shoes and hence the sole is also important. Don’t feel shy to turn it in an angle where the bottom is in close view. Show the grip, the sole texture, everything. No detail is unimportant from the buyer angle. Logo should also show if you are selling branded footwear.
It might be tempting to add details like the packaging or textured background. Avoid at all costs. Anything that takes the limelight away from the actual buy is not a good idea. Clean white background – we repeat.
4. Never zoom close or crop tight
If you have to show the shoe strap or buckle, go close. Don’t zoom in because it will make the details blurry. And you will only notice that at the time of editing. You also don’t want to ensure that the white backdrop you choose is very large and the shoe is covered 360 by the white expanse. You don’t want to work on cropping tightly around the shoe later.
You already have what it takes
eCommerce is ever so growing and the buyers have too much to handle. Your image speaks of your product, which in turn speaks for your brand. Make sure that you are always making a great, long-lasting first impression on your visitors with a pristine and sharp imagery.
This footwear photography 2020 guide will leave your customers with an irresistible urge to click that ‘buy’ button